
Submit your app for review and Marketplace listing
Prepare, submit, and get your Vibe app approved for Marketplace listing.
Use this guide to prepare, submit, and get your Vibe app approved for Marketplace listing on the first review.
Read this before you complete the app form in the Vibe Developer tool. Most submissions come back because of listing content and requested scopes—not code.
Before you start
Complete these requirements before you create or submit an app:
| Requirement | What to do |
|---|---|
| Vibe account | Create apps in the Vibe app: open the account menu, then Developer tool. developers.vibe.co contains documentation and API reference. |
| Accepted developer terms | Accept the developer terms and conditions in the app before you build. This acceptance is the gate; there is no sales form or platform fee. |
| Working integration | Submit only after your integration works end-to-end against the API. Review evaluates a working app, not an idea. |
| Distribution decision | Decide whether the app will be private or public before you create it. This choice is difficult to undo. |
Note: This is not the same as API keys in the Vibe ad platform. That separate, legacy mechanism is being deprecated. Developer Platform credentials are issued by your app in the Developer tool. If you are migrating, see Migration Guide from API Key.
Step 1 — Choose private or public
Every app starts private. Private and public are distribution settings, not separate products. A private app cannot appear in the Marketplace by accident: listing requires a deliberate, manual submission.
| Private app | Public (Marketplace) app | |
|---|---|---|
| Who can install it | Only accounts you designate | Any Vibe advertiser through the Marketplace |
| Review | None; live immediately | Vibe review; typically 5–10 business days |
| Listing content | Not required | Required: logo, description, screenshots, and URLs |
| Typical use | Your own book of business, one named client, or a pilot | A data, creative, or measurement capability for every Vibe advertiser |
Best practice: start private, then graduate. Build and test privately with one client, prove that the integration works in production, then submit it for the Marketplace. Reviewers respond well when you can say the app has been running privately for a specified number of weeks, and you avoid using a review cycle on an integration that is still changing.
Switching an app from private to public cannot be reverted in the portal today. If the app changes unintentionally, contact your partner manager or support. Do not create a duplicate app as a workaround.
Step 2 — Add app information
In My applications, select New application. Complete each field with information an advertiser can understand.
| Field | What good looks like |
|---|---|
| App name | Use the product name your customers know. Do not include “Vibe,” “integration,” or version numbers. For example, use Stella, not Stella for Vibe v2. |
| Slug | Use lowercase letters and hyphens. The slug becomes part of your listing identity, so choose a stable value. |
| Category | Select the one category where an advertiser would look for the primary use case, such as Attribution & Measurement, Audiences & Data, or Creative. Do not choose the broadest possible category. |
| Logo | Upload a square, high-resolution logo with a transparent background and no tagline baked in. It appears small in the Marketplace grid, so test it at about 64 px. |
| Description | Write the Marketplace listing content described in Step 5. |
| Support or documentation URL | For public apps, publish a page a Vibe advertiser can access without signing in. It must explain setup and troubleshooting for this integration. A generic homepage or “contact sales” form does not qualify. |
| Privacy policy and terms URLs | Publish current URLs that are publicly reachable. |
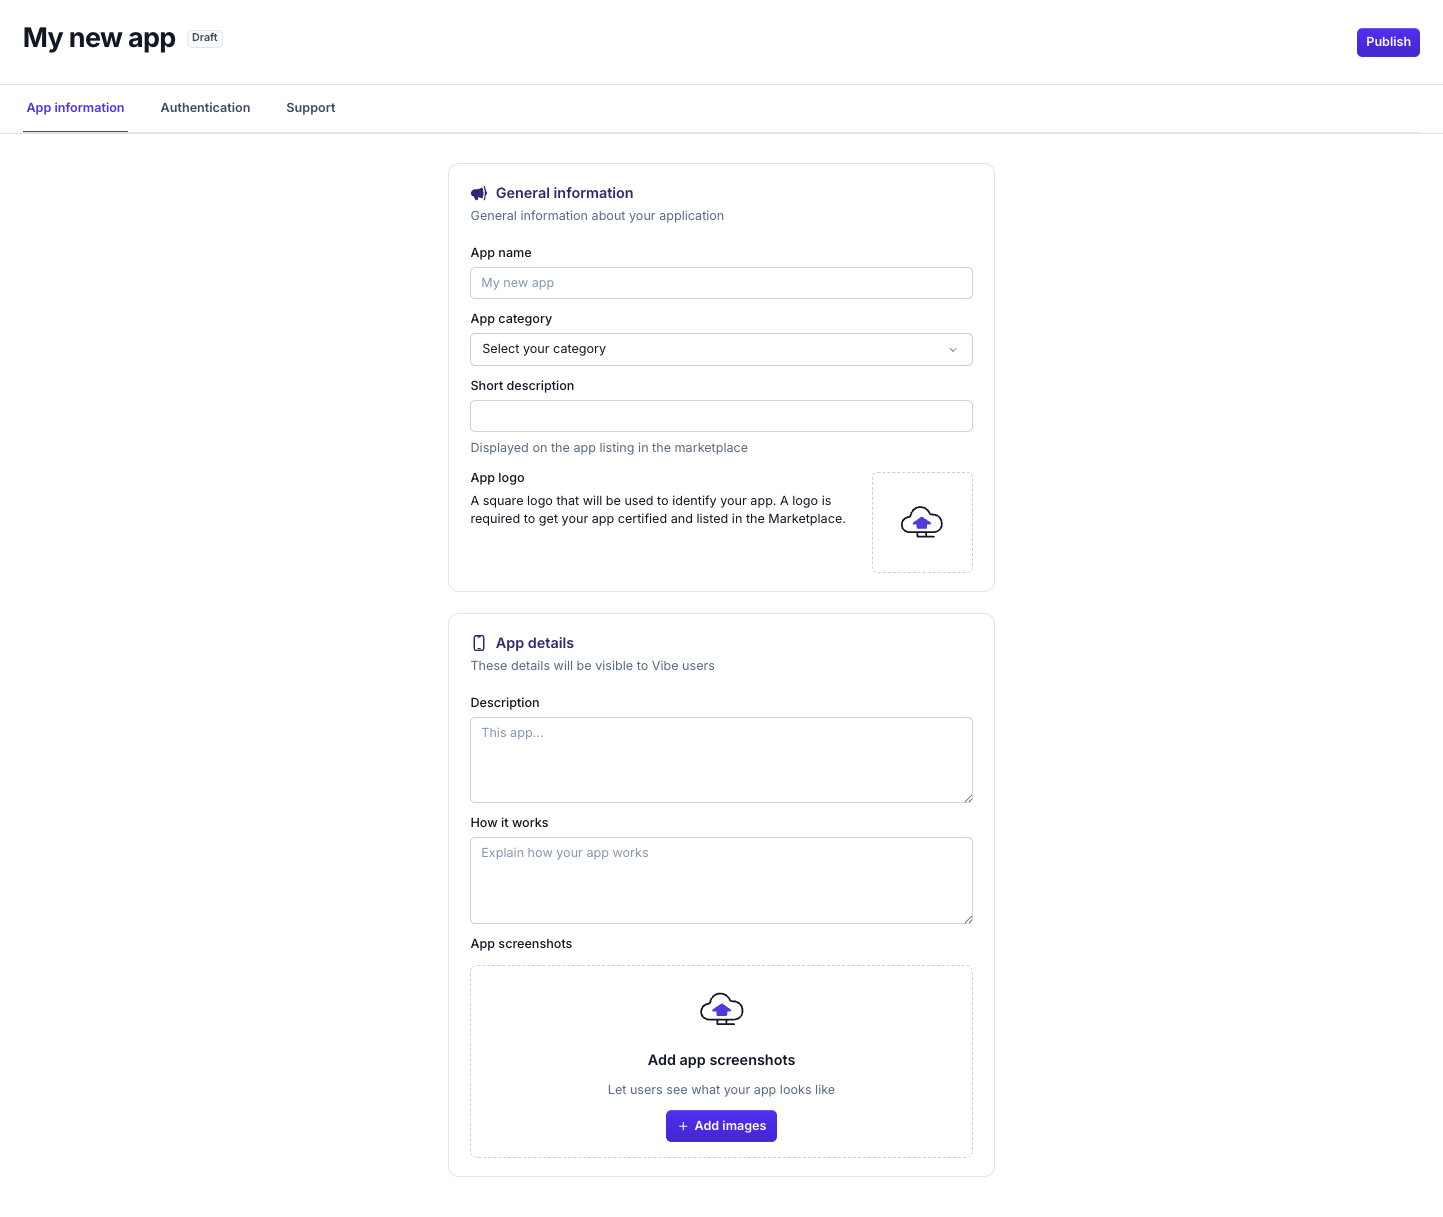
Complete the App information tab before submitting for Marketplace review.
Write the listing for the advertiser, not for the review team. A marketer deciding whether to select Install needs to understand what the app does for campaigns, what it needs from them, and how long setup takes.
Step 3 — Configure authentication
Choose the authentication method that fits how your integration will be installed and used.
API key (client credentials)
Use client credentials for server-to-server work. Your app mints a fresh access token for each job with its client ID and secret, so you do not need to rotate or store tokens between runs. This works well for scheduled batch work, such as a nightly reporting sync.
Credentials are bound to one account. When an account installs your app, Vibe issues a client ID and secret that work only for that account, including every advertiser underneath it. To access a second account, that account must install the app and receive its own credential pair; no account or tenant header can redirect an existing credential.
An integration that serves many customer accounts is multi-tenant. It requires a public, Marketplace-approved app so that other accounts can install the app and generate their own credentials. Your app is the template, and the scopes you choose determine what each installed credential can access.
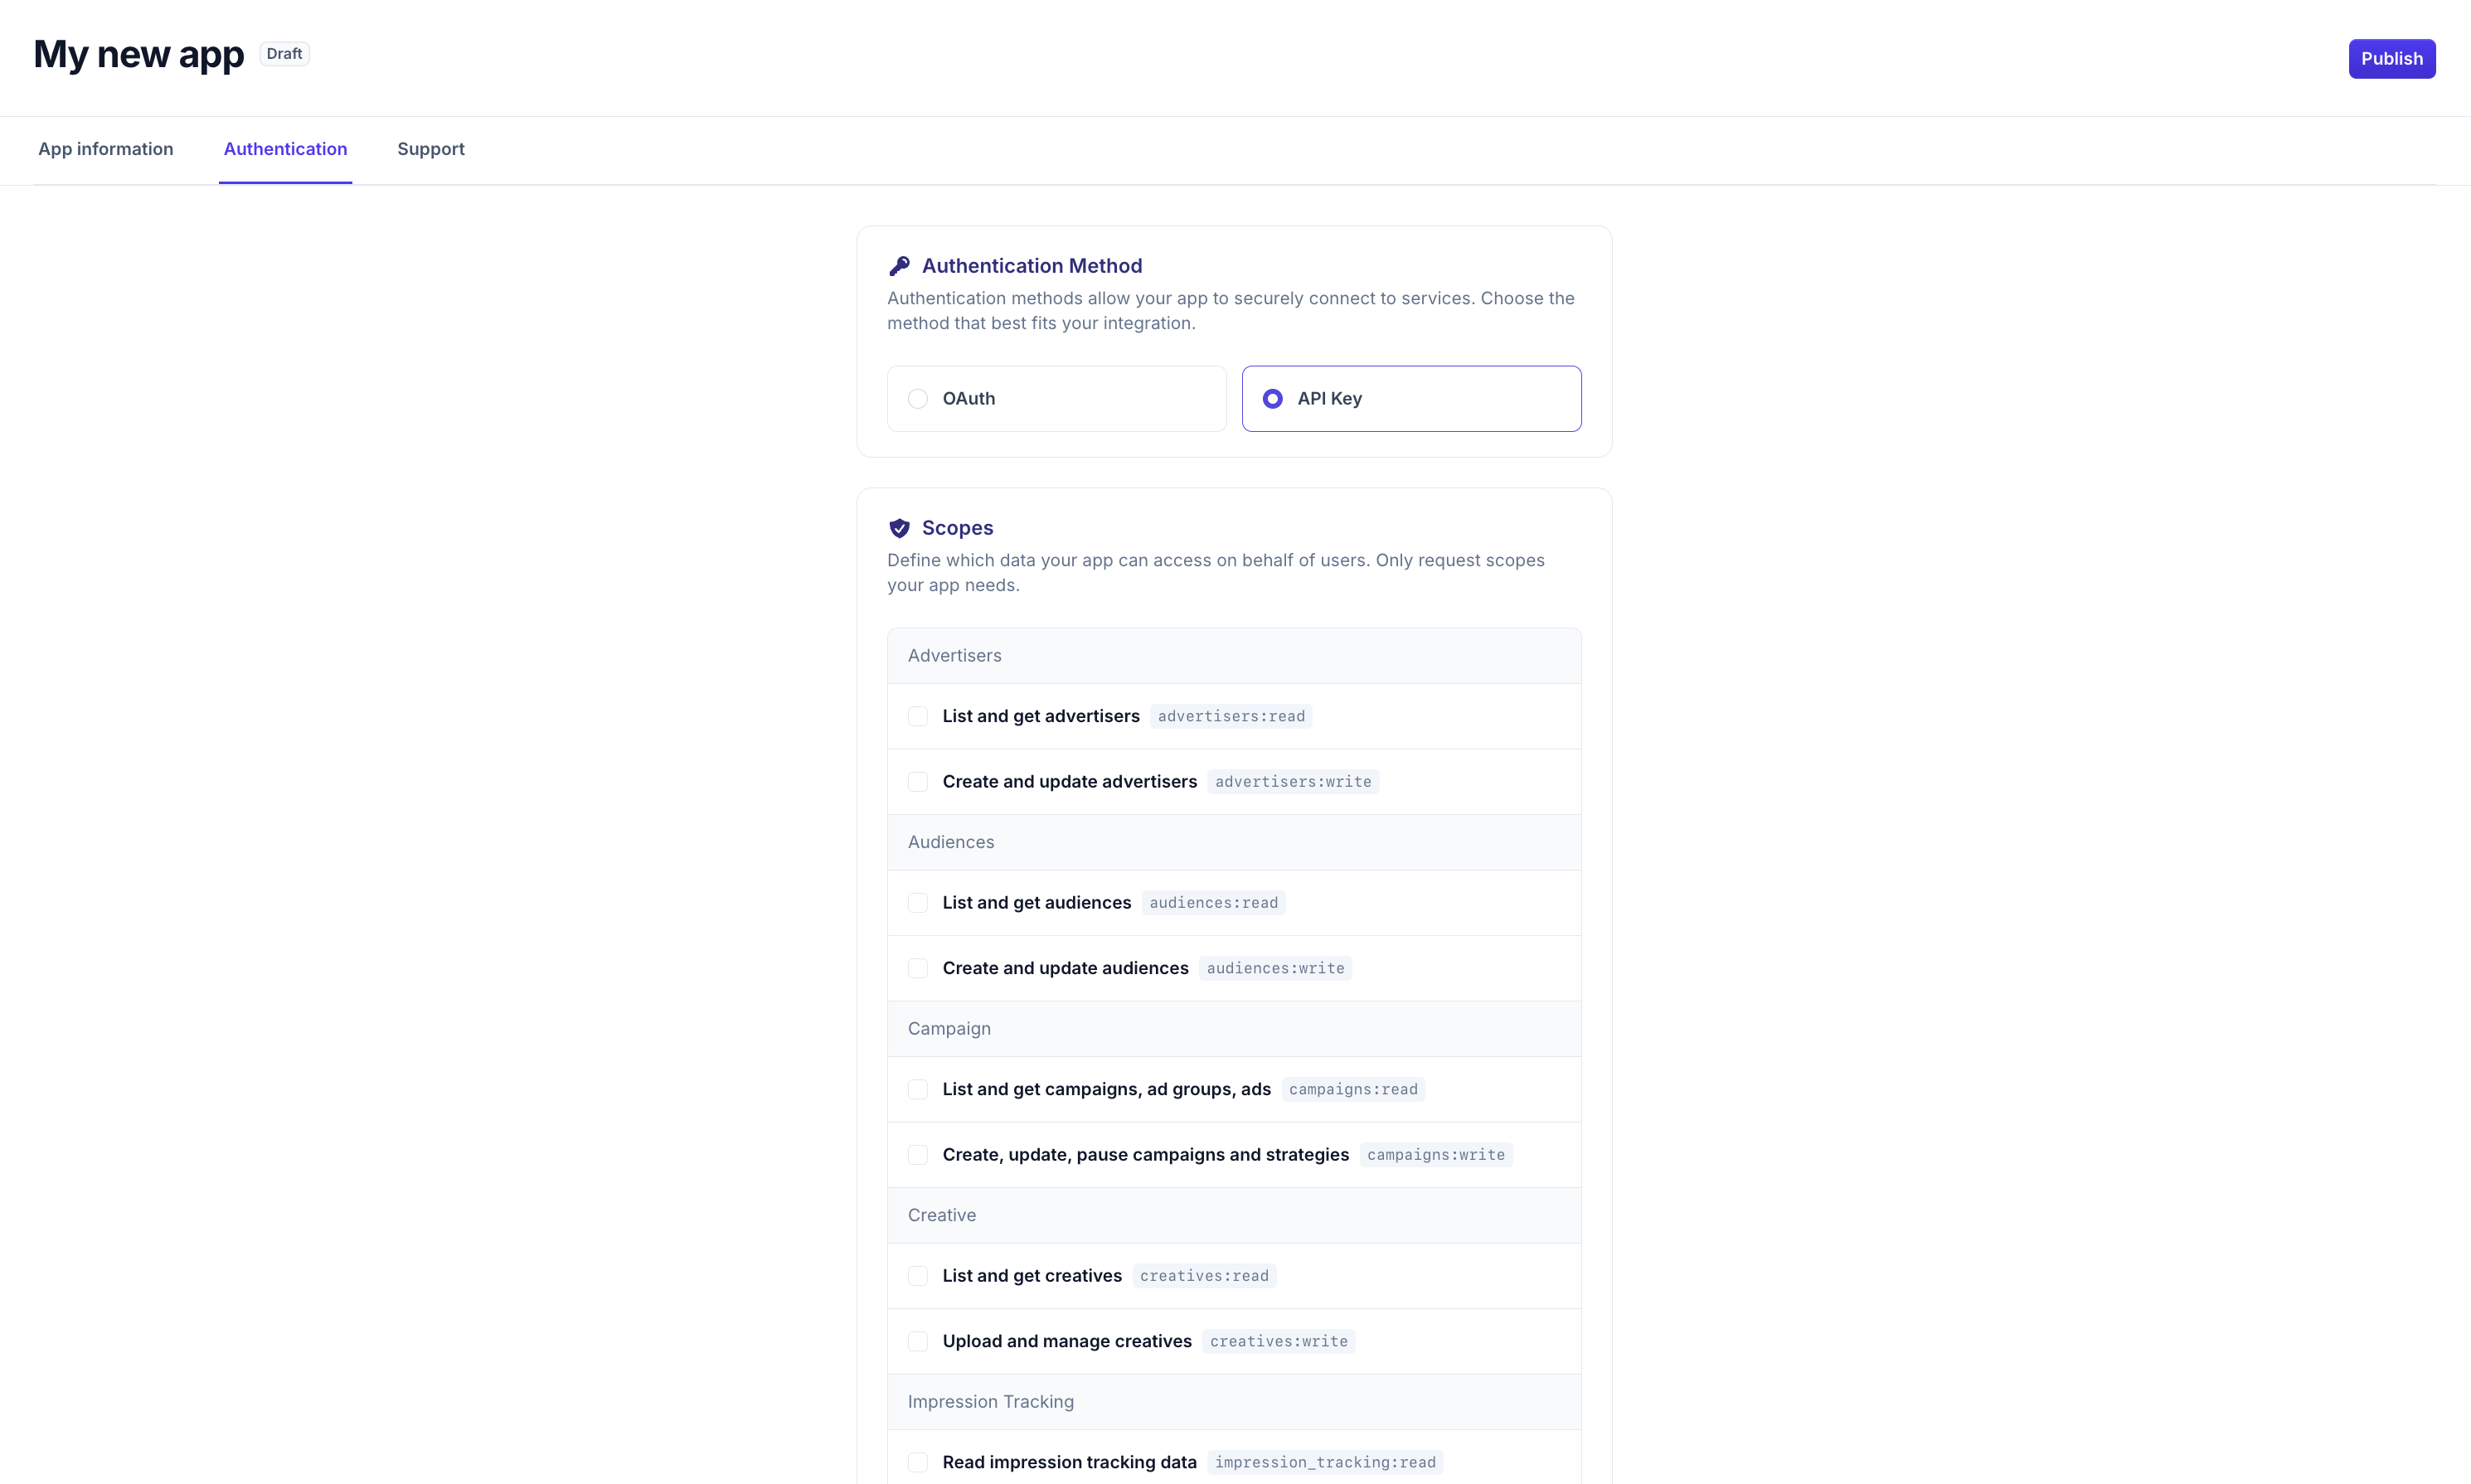
Select API Key authentication and request only the scopes your integration uses.
For setup instructions, see Start your Client Credentials flow.
OAuth 2.0 (authorization code)
Use OAuth 2.0 authorization code flow for multi-tenant apps that connect many customers. Each advertiser consents once and installs the app themselves. This is required for embedded or white-label builds and provides a smoother experience for any app with one-click installation.
Configure the following values in the app form:
- Redirect URIs: Register every environment you use. Each URI must be exact, use HTTPS, and contain no trailing whitespace.
- Grant types: Select the OAuth flows your app uses.
- Requested scopes: Request only the scopes described in Step 4.
Design your token storage around these rules:
- Access tokens are valid for one hour.
- Refresh tokens are valid for 90 days. Every refresh returns a new access token and a new refresh token with a fresh 90-day validity period.
- Per RFC 6749 §6, discard the old refresh token and persist the new one. A refresh token expires only after 90 days without a refresh.
- Your
client_idandclient_secretare issued when you install the app in your account. Copy the secret immediately because it is shown once.
If OAuth configuration errors continue after you check for typos and trailing spaces, delete the app and recreate it with the same configuration. Partners have resolved stuck authentication state this way. Do this before submission, not during review.
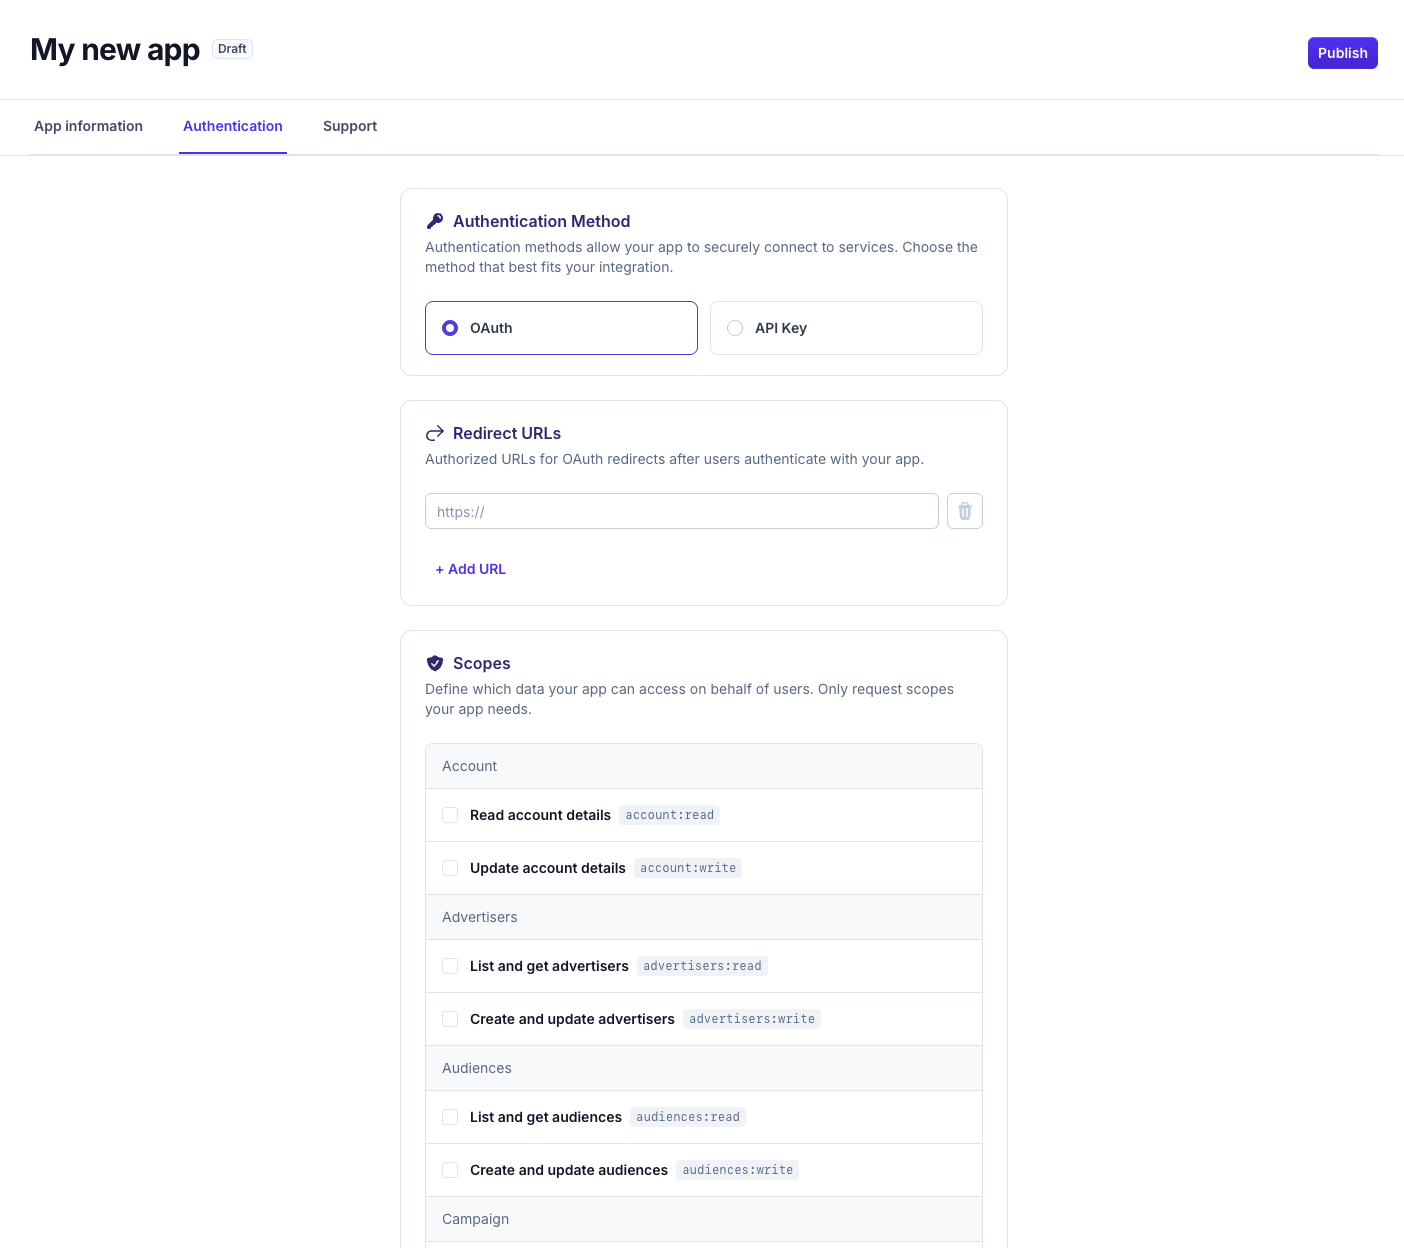
Select OAuth authentication, register redirect URLs, and request minimum scopes.
For setup instructions, see Start your OAuth flow.
Step 4 — Request minimum scopes
Request only the scopes your integration calls. Over-scoping is the most common reason a submission is returned.
For example, a reporting integration that reads spend needs advertisers:read and reporting:read, with no additional scopes. A creative integration that uploads assets needs creatives:read and creatives:write. If you may add campaign controls later, request campaign write access in a new version when you actually add that feature.
Reviewers compare the requested scopes with the use case in your listing. Be ready to explain every requested scope in one sentence.
Access-restricted scopes
Accounts and Advertisers provisioning scopes, which let you create top-level accounts and advertisers programmatically, are not self-serve. They support white-label and multi-tenant builds and require approval from the Integrations team.
If your app provisions a separate tenant for each customer, discuss the access-restricted scopes with your partner manager before submission. The app form cannot grant them.
Step 5 — Write Marketplace listing content
This section applies only to public apps. It is the content advertisers read in the Marketplace.
Tagline
Write one line that says what the app does and who it serves.
Connect your HubSpot CRM for seamless audience targeting and performance tracking on Streaming TV.
Overview
Write three or four short paragraphs. Start with the advertiser outcome, explain how the integration works, then state how much effort setup requires. Write in second person and avoid adtech jargon your advertiser does not use.
Features
Create two to four feature blocks. Give each one a concrete heading and two or three sentences. Name the objects the advertiser will use, such as “Select CRM Audiences,” “choose any HubSpot list,” and “launch in minutes,” rather than describing capabilities in the abstract.
Screenshots
Prepare screenshots that meet all of these requirements:
- Crop to your product UI only. Remove browser chrome, URL bars, and desktop backgrounds.
- Show the Vibe-connected workflow, not your login screen or homepage.
- Use realistic data and redact sensitive information.
- Use consistent dimensions throughout the screenshot set.
Best practice: finalize the listing before submission. An approved listing is locked for edits today. You cannot freely revise copy or screenshots after it goes live; changes must go through your partner manager. Listing versioning and self-serve resubmission are planned, but until then, treat submission as publication.
Step 6 — Submit for review
Submit the app explicitly in the portal. Creating a public app does not add it to the review queue.
The app moves through these states:
draft → pending review → live
Only a live public app is visible to other Vibe users. Private apps remain private and are visible only to your team.
Expect a decision in 5–10 business days. To shorten the review, post a short note in your partner channel when you submit that includes:
- App name, slug, and category.
- What the integration does in two sentences and which mutual customers use it.
- Authentication type and each requested scope, with a one-line justification.
- Expected call volume, such as
~one async report per advertiser per day. - Whether the integration is read-only.
This note answers the reviewer’s checklist in advance. Submissions that include it are approved materially faster.
Pre-submission checklist
- Test the integration end-to-end in production against a real account.
- Reduce scopes to the minimum and be able to justify each one in one sentence.
- Discuss Accounts or Advertisers access-restricted scopes with Partnerships, if needed.
- Confirm every redirect URI is exact, HTTPS, and free of trailing whitespace.
- Publish a public support or documentation URL specific to this integration.
- Confirm privacy policy and terms URLs are live.
- Verify that the logo is square, transparent, and legible at 64 px.
- Crop screenshots to the UI, remove URL bars, and use realistic data.
- Finalize listing copy because it locks after approval.
- Review rate limits and confirm the expected volume stays within them.
After approval
No advertiser-side feature flag is required. Once Vibe approves the app, advertisers can find and install it from the Marketplace.
- Installing the app displays client credentials in a popup. Secrets are shown once.
- Editing a live listing is not self-serve. Contact your partner manager for changes.
- Monitor real traffic during the first week, especially when you backfill history after installation.
Reporting-specific notes
If your app reads reporting data, account for these constraints before promising SLAs to your customers:
- Reports are asynchronous.
- You can query as far back as needed, but each request can cover a maximum of 45 days. Use date windows to backfill longer periods.
spendis final billed spend in USD.- Treat a day’s data as settled 12–24 hours after that day ends. Do not present current-day data as final in your UI.
Common reasons a submission comes back
| What reviewers see | Fix |
|---|---|
| More scopes than the use case needs | Reduce the request to the minimum and provide a justification for each scope. |
| No support or documentation URL | Publish a specific setup and troubleshooting page, then add its public URL. |
| Screenshots show a URL bar or browser chrome | Recrop screenshots to the product UI only. |
| Listing copy describes the company instead of the integration | Rewrite around what the advertiser receives and does. |
| A multi-tenant app requests account provisioning self-serve | Route the access-restricted scope request through Partnerships first. |
| The app is submitted before it works end-to-end | Finish and test the integration, then submit again. |
FAQ
Can a private app appear in the public Marketplace?
No. Apps remain private until you explicitly submit them and Vibe approves them. Marketplace listing is deliberate and manual.
Does one client credential pair cover multiple customers?
Not across accounts. Vibe issues credentials at installation, and each pair is bound to the account where it was installed. The pair can access every advertiser under that account, but not advertisers in other accounts. Each customer with its own Vibe account installs the app and receives its own credentials.
One credential pair covers the roster only when customers are consolidated as advertisers under the same account.
Should I use OAuth or an API key?
Use an API key through client credentials for server-to-server work within one account. Use OAuth 2.0 for multi-tenant apps connecting many customer accounts; it makes consent and per-account credentials a one-click installation and is required for embedded or white-label builds.
Are there platform or integration fees?
No. Building on the Developer Platform is free. The only cost is media spend at the Vibe rate.
Do we need ads.txt to buy through Vibe?
No. ads.txt and app-ads.txt are supply-side mechanisms that authorize inventory sellers. Apps buying CTV through Vibe operate on the buy side.
How do we change a live listing?
Contact your partner manager. Self-serve listing versioning is planned but is not currently available.
Updated 19 days ago